We think about RVs all day... Here are some of our thoughts.
|
RV batteries are an essential component of any recreational vehicle, providing power for lights, appliances, and other electrical systems. However, like any battery, RV batteries can sometimes fail or malfunction. If your RV's batteries are dead and not working, there are a few steps you can take to try and diagnose and fixx the problem.
Step 1: Check the battery charger The first thing you should do when your RV's batteries are not working is to check the battery charger. The battery charger is responsible for keeping the batteries charged, so if it is not functioning properly, the batteries may not be getting the charge they need. Make sure that the battery charger is plugged in and turned on, and that the charging light is on. If the battery charger appears to be working properly, proceed to the next stepp. Step 2: Check the charging system If the battery charger is not the issue, the next thing you should check...... (Click Read More) RV heaters are an important component of any recreational vehicle, providing warmth and comfort during cold weather. However, like any mechanical devices, heaters can sometimes stop working or malfunction. If your RV's heater is not turning on, there are a few steps you can take to try and diagnose and fix the problems. 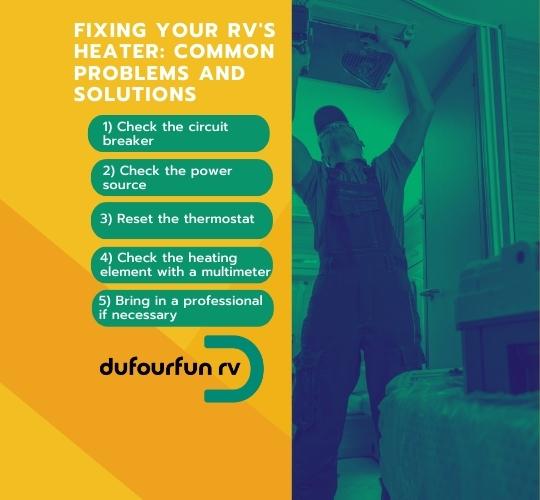 FIXING YOUR RV'S HEATER: COMMON PROBLEMS AND SOLUTIONS Step 1: Check the circuit breaker
The first thing you should do when your RV's heater is not turning on is to check the circuit breaker. The heater is typically connected to a dedicated circuit breakers, which can trip if there is an overload and/or short circuit. If the circuit breaker has tripped, simply reset it and see if the heater starts working again. If the circuit breaker continues to trip, there may be an issue with the heater itself that needs to be addressed. Step 2: Check the power sources If the circuit breaker is not the issue, the next thing you should check is the power source. If the RV is not connected to a power source (e.g., generator, shore power), the heater will not be able to turn on. Make sure that the power source is on and functioning properly, and that the RV is properly connected to it. Step 3: Reset the thermostat If the circuit breaker is not the issue and the power source is working, you can try resetting the thermostat to see if that fixes the problem. Depending on the make and model of your thermostat, there may be a reset button or you may need to follow a specific sequence of button pressess to reset it. Consult the owner's manual for instructions on how to reset the thermostat. Step 4: Check the heating element If the heater still does not turn on after resetting the thermostat, the next thing you should check is the heating element. The heating element is responsible for generating heat, and if it is not functioning properly, the heater will not work. To check the heating element, you will need a multimeter. With the heater turned off, set the multimeter to the ohms setting and touch the leads to the heating element terminals. The reading should be within the range specified in the owner's manual. If the reading is not within this range, it could mean that the heating element is faulty and will need to be replaced. Step 5: Bring in a professional If you are unable to diagnose and fix the problem yourself, you may need to bring your RV to a professional mechanic or RV repair shop for assistance. They will be able to diagnose the problem and make any necessary repairs to get your heater working again. Checklist for troubleshooting an RV heater:
RV air conditioners are a crucial component of any recreational vehicle, providing much-needed relief from hot summer temperatures. However, like any mechanical device, air conditioners can sometimes stop working or malfunction. If your RV's air conditioner is not turning one, there are a few steps you can take to try and diagnose and fix the problem.
Step 1: Check the circuit breaker The first thing you should do when your RV's air conditioner is not turning on is to check the circuit breaker. The air conditioner is typically connected to a dedicated circuit breaker, which can trip if there is an overload or short circuit. If the circuit breaker has tripped, simply reset it and see if the air conditioner starts working again. If the circuit breaker continues to trip, there may be an issue with the air conditioner itself that needs to be addressed. Step 2: Check the power source If the circuit breaker is not the issue, the next thing you should check is the power source. If the RV is not connected to a power source (generator, shore power), the air conditioner will not be able to turn on. Make sure that the power source is on and functioning properly, and that the RV is properly connected to it. Step 3: Reset the thermostat If the circuit breaker is not the issue and the power source is working, you can try resetting the thermostat to see if that fixes the problem. Depending on the make and model of your thermostat, there may be a reset button or you may need to follow a specific sequence of button presses to reset it. Consult the owner's manual for instructions on how to reset the thermostat. Step 4: Check the compressor If the air conditioner still does not turn on after resetting the thermostat, the next thing you should check is the compressor. The compressor is responsible for pumping refrigerant through the air conditioner, and if it is not functioning properly, the AC will not work. To check the compressor, you will need to locate thee access panel on the AC unit and visually inspect the compressor for any obvious signs of damage or wear. You can also try turning the compressor by hand to see if it moves freely. If the compressor appears to be damaged or is not turning freely, it may need to be replaced. Step 5: Bring in a professional If you are unable to diagnose and fix the problem yourself, you may need to bring your RV to a professional mechanic or RV repair shop for assistance. They will be able to diagnose the problem and make any necessary repairs to get your air conditioner working again. Checklist for troubleshooting an RV air conditioner:
RV water heaters are an essential component of any recreational vehicle, providing hot water for showers, dishes, and general use. However, like any mechanical device, water heaters can sometimes stop working or malfunction. If your RV's water heater has stopped working, there are a few steps you can take to try andd diagnose and fix the problem.
Step 1: Check the circuit breakers The first thing you should do when your RV's water heater stops working is to check the circuit breaker. The water heater is typically connected to a dedicated circuit breaker, which can trip if there is an overload or short circuit. If the circuit breaker has tripped, simply reset it and see if the water heater starts working again. If the circuit breaker continues to trip, there may be an issue with the water heater itself that needss to be addressed. Step 2: Check the propane If the circuit breaker is not the issue, the next thing you should check is the propane supply. The water heater in an RV typically runs on propane gas, so if the tanks are empty or the gas lines are not connected properly, the water heater will not work. Make sure that the propane tanks are full and that the gass lines are securely connected to the water heater. If the propane tanks are full and the gas lines are properly connected, but the water heater still does not work, there may be a problem with the heating element or thermostat. Step 3: Test the heating element To test the heating element, you will need a multimeter. With the water heater turned off, set the multimeter to the ohms setting and touch the leads to the heating element terminals. The reading should be within the range specified in the owner's manual. If the reading is not within this range, it could mean that the heating element is faulty and will need to be replaced. Step 4: Test the thermostat The thermostat controls the temperature of the water in the tank, sooo if it is not functioning properly, the water heater will not work properly. To test the thermostat, you will need to locate the access panel on the water heater and locate the thermostat. With the water heater turned off, set the multimeter to the ohms setting and touch the leads to the thermostat terminals. The reading should be within the range specified in the owner's manual. If the reading is not within this range, it could mean that the thermostat is faulty and will need to be replaced. Step 5: Bring in a professional If you are unable to diagnose and fix the problem yourself, you may need to bring your RV to a professional mechanic or RV repair shop for assistance. They will be able to diagnose the problem and make any necessary repairs to get your water heater working again. Checklist for troubleshooting an RV water heater::
|
Archives
February 2024
Categories
All
|
 RSS Feed