We think about RVs all day... Here are some of our thoughts.
|
RV water heaters are an essential component of any recreational vehicle, providing hot water for showers, dishes, and general use. However, like any mechanical device, water heaters can sometimes stop working or malfunction. If your RV's water heater has stopped working, there are a few steps you can take to try andd diagnose and fix the problem.
Step 1: Check the circuit breakers The first thing you should do when your RV's water heater stops working is to check the circuit breaker. The water heater is typically connected to a dedicated circuit breaker, which can trip if there is an overload or short circuit. If the circuit breaker has tripped, simply reset it and see if the water heater starts working again. If the circuit breaker continues to trip, there may be an issue with the water heater itself that needss to be addressed. Step 2: Check the propane If the circuit breaker is not the issue, the next thing you should check is the propane supply. The water heater in an RV typically runs on propane gas, so if the tanks are empty or the gas lines are not connected properly, the water heater will not work. Make sure that the propane tanks are full and that the gass lines are securely connected to the water heater. If the propane tanks are full and the gas lines are properly connected, but the water heater still does not work, there may be a problem with the heating element or thermostat. Step 3: Test the heating element To test the heating element, you will need a multimeter. With the water heater turned off, set the multimeter to the ohms setting and touch the leads to the heating element terminals. The reading should be within the range specified in the owner's manual. If the reading is not within this range, it could mean that the heating element is faulty and will need to be replaced. Step 4: Test the thermostat The thermostat controls the temperature of the water in the tank, sooo if it is not functioning properly, the water heater will not work properly. To test the thermostat, you will need to locate the access panel on the water heater and locate the thermostat. With the water heater turned off, set the multimeter to the ohms setting and touch the leads to the thermostat terminals. The reading should be within the range specified in the owner's manual. If the reading is not within this range, it could mean that the thermostat is faulty and will need to be replaced. Step 5: Bring in a professional If you are unable to diagnose and fix the problem yourself, you may need to bring your RV to a professional mechanic or RV repair shop for assistance. They will be able to diagnose the problem and make any necessary repairs to get your water heater working again. Checklist for troubleshooting an RV water heater::
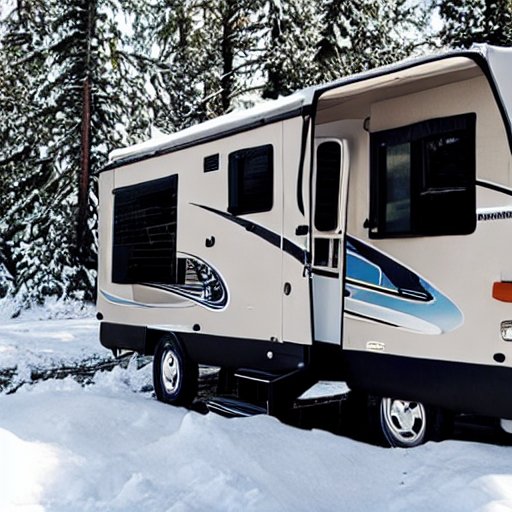
Winterizing your RV is a very important step to take to protect it from the harsh winter weather and ensure that it is ready to use when the warm weather returns. Here are some tips for winterizing your RV:
 Introduction: As an RV owner, you know that unexpected repairs can happen at any time. While some issues may require the expertise of a professional technician, there are many common repair issues that you can tackle on your own. In this article, we will discuss 5 common RV repair issues and provide step-by-step instructions on how to fix them. 
Before you hit the road, it's important to make sure everything is in working order. Trust me, you don't want to be stranded on the side of the road miles away from home.
First things first, check your tires. When your RV sits in storage, the tires lose air pressure at a rate of about two to three psi per month. Make sure you inflate them to the proper pressure before leaving on your trip. And always check the tires when they are cold, before traveling more than one mile. Inspect the tires for any checking or cracks in the sidewalls. If you see any damage, don't chance it. It's better to be safe than sorry. While you're down there, take a look at the lug nuts on the wheels. Discoloration and stains around the lug nuts could be an indication they are loose. Make sure they are tightened before you head out. And don't forget to check all items in the exterior storage compartments to make sure they are secure. Lock all outside storage compartments before you go. Next, make sure all your cords, hoses, and jacks are properly stowed. Disconnect the power cords, water hose, and sewer hose and stow them away. Raise any stabilizer jacks or hydraulic leveling jacks. And while you're looking under the RV, check for any leaks. Now it's time to check the fluid levels. This applies to motorized RVs or the tow vehicle if you're towing a trailer. Nothing will leave you stranded on the side of the road faster than a low or empty fluid level in a major component like the engine or transmission. Check the engine oil, transmission fluid, radiator coolant, power steering fluid, and brake fluid levels. If a fluid level is low, try to determine why and correct the problem before leaving on your trip. Make sure all the slide outs are in the travel position and the TV antenna is stowed in the proper position for traveling. Check the awning to make sure it is securely stored and all the travel locks and knobs are tight and locked. Stow or retract the steps and fill the fresh water holding tank with enough potable water to get to your destination. Before you hit the road, it's important to check the headlights, taillights, and brakes. Make sure they are all functioning properly and the bulbs are not burnt out. And don't forget to check the windshield wipers and make sure they are in good working order. You never know when you might encounter a little rain on your trip. Finally, make sure you have all your necessary documents and supplies with you. This includes your RV registration, proof of insurance, and any necessary permits. And don't forget to pack some snacks and a first aid kit in case of emergencies. So there you have it, my pre-trip checklist for RVing. If you follow these simple steps, you should have a smooth and enjoyable trip. Happy travels! Pre-Trip Checklist for RVing:
An RV roof leak can be a major inconvenience, as it can lead to water damage and other issues. There are several potential causes of an RV roof leak, including damaged roofing material, missing or damaged sealant, and punctures or tears in the roof. Here is a 500-word article about troubleshooting and repairing an RV roof leak, along with a checklist of steps to follow:
Step 1: Identify the source of the leak The first step in repairing an RV roof leak is to identify the source of the leak. This can often be the most challenging part of the process, as the water may not be coming in through the same spot where you can see the damage. One way to pinpoint the location of the leak is to use a flashlight to search for water stains or discoloration on the roof and inside the RV. You can also try setting a bucket on the roof to catch any water that comes in, which can help you determine the location of the leak. Step 2: Repair or replace damaged roofing material If the source of the leak is due to damaged roofing material, such as a missing shingle or a puncture in the rubber roof, you will need to repair or replace the damaged material. If the damage is minor, you may be able to patch the area with roofing specific materials or a sealant. However, if the damage is more extensive, you may need to replace the damaged section of the roof. Step 3: Check and repair or replace sealant Even if the roofing material itself is in good condition, an RV roof leak can still occur if the sealant around the edges and seams of the roof is missing or damaged. To fix this type of leak, you will need to inspect the sealant and repair or replace it as needed. Step 4: Check for punctures or tears in the roof Another potential cause of an RV roof leak is a puncture or tear in the roof. These types of damages can be caused by impact, such as a tree branch falling on the roof, or by wear and tear over time. To fix a puncture or tear in the roof, you will need to patch the area with a patch kit or by applying a sealant. Step 5: Bring in a professional If you are unable to diagnose and fix the problem yourself, you may need to bring your RV to a professional mechanic or RV repair shop for assistance. They will be able to diagnose the problem and make any necessary repairs to fix your roof leak. Checklist for troubleshooting and repairing an RV roof leak:
|
Archives
February 2024
Categories
All
|
 RSS Feed